Thursday, March 14, 2013

A Deconstructed Dalek


I really enjoy drawing on metal using a rotary tool.  I was thinking about drawing more daleks and decided I would make a piece with a series of links.  Each link would be an up-close snapshot of the different patterns and textures.


I started out by selecting a few irregularly shaped pieces of copper.  After hammering them flat, I filed and sanded the edges and corners.
I drilled holes in each corner and sanded the faces of each link.  Then I used a rawhide mallet and a stake to slightly curve the pieces.  I used a graphite pencil to sketch out the drawing and engraved every other piece.
Using liver of sulphur, I oxidized the pieces.
I buffed the engraved links so that the faces became shiny again, but the engraved grooves stayed oxidized.  The other links were engraved so that the faces were oxidized and the engraved lines exposed the shiny copper.
I made copper jump rings by coiling copper wire around a dowel and cutting the rings off with a jeweler's saw.
The engraved links were attached using the jump rings.  On the end I also attached a copper hook that I made.

 Ta-da.


Wednesday, March 13, 2013

Prong Setting

Prong Setting

I came across a prong setting tutorial while surfing pinterest.  Being a visual person, I love tutorials with video.

I decided to give it a try since I had this pretty moss agate stone that I thought would look best in a setting that allowed light to pass through.
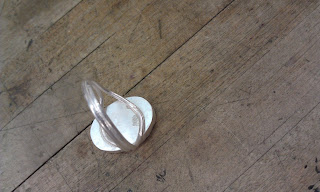
 I used my pliers to bend two pieces of 20 ga sterling silver wire into "w" shapes.
There was a little jumping during soldering, so the bottom join overlapped a bit.  I decided to keep going with it rather than attempt to unsolder it.  It looked a little like a stick figure person.
I centered the setting on the stone and used a sharpie to mark where the prongs would be bent.
After using my pliers to bend each prong 90 degrees, I trimmed them so they were even and filed the ends.  Then I popped the stone in.
Each prong was burnished over the stone and the piece was strung on a sterling silver chain.

It turned out pretty well, but I think next time I would make six prongs for an even more secure setting.

It was a great tutorial and I am glad I came across it.  I will probably try this again with an irregular stone.


Thursday, March 7, 2013

Facebook Giveaway

My birthday is this Saturday and my b-day wish is for my facebook page to get 250 likes.
So, I am sponsoring a giveaway of a custom ring for people who "like" my page and share the giveaway post.

I will select a winner to receive one of my pierced band rings.
Pierced Horse Silhouette band, size 6, rough texture, copper


Here are some of the custom options available for the winner to choose from:

Size - I will fabricate the ring by hand to fit the winner
Band width - between 1/2" and 3/4"  (any smaller and the pierced design might not fit) 
                           or a tapered band that is thinner in the back and wider in the front.
Pierced Design- horse profile (as shown)  or a heart
Surface Treatment - high polish, hammered or rough texture
Patina - copper or oxidized

Pierced Heart Band, size 7, hammered, oxidized copper

 If I get 275 likes, I will add an option for sterling silver.
If you are sensitive to copper, please note that I coat all of my pieces with everbrite protectaclear which will protect the patina and provide a barrier between the copper and your skin.

Any questions?  Let me know!


Wednesday, March 6, 2013

Pierced Ring

I usually try to follow the "No Lucky Charms" rule in my work, but I decided to break it and pierce a heart in this simple band.
I started out by cutting a strip of copper about 2 1/4" by 3/4".  I used a sharpie to draw where I wanted the heart, then punched and drilled the rounded tops of the heart.  I used a jeweler's saw to roughly pierce out the rest of the heart shape.
I didn't worry too much about getting it perfect since it was likely to distort when I formed and hammered the band.  I could (and probably should) have waited and pierced it after I had finished forming and hammering.
I used a ring mandrel to form the strip into a band and soldered the ends.
I hammered the band on a mandrel, then used needle files and polishing paper to clean up the heart.
The top and bottom of the band were sanded and burnished to make it comfortable to wear.
I dipped the ring into liver of sulphur to oxidize the copper to a warm brown, then lightly buffed the surface with high grit polishing paper to create a little contrast.

If you like this ring, you can check out its listing in my etsy shop, Copper Mare.


Sunday, March 3, 2013

Bezel Rings Continued

I felt pretty good about my bezel set pieces, so I selected a larger stone and decided to try something a little different with the band.  I measured, cut, filed and soldered a strip of scalloped bezel wire to fit around my "snowflake obsidian" stone.
After soldering the bezel walls to a sheet of silver, I trimmed off the excess sheet.  (Same as the previous bezel rings.)

I took two pieces of 16 ga silver wire and soldered them to make rings.  Then I hammered them on the corner of a steel block to flatten one section.
When I lined the two rings up, they looked like this:
After soldering them together, I used pliers to stretch the open section a little more.  I then filed them flat to provide a surface on which to solder the bezel cup.
Once the piece had been soldered pickled and cleaned, I popped the obsidian cap in and burnished the bezel wall.


Saturday, March 2, 2013

Ruby Ring

I've been on a ring-making kick lately.
I tried my hand at a bezel setting this week.  I didn't want to waste any silver on my first attempt, so I ran a strip of copper through a rolling mill to thin it enough to make the bezel walls.  I used the copper bezel to set a piece of fused glass.

It turned out reasonably well, so I took the plunge and made a ring using sterling silver and a sweet little ruby cabachon.
I measured, cut, filed and soldered the silver bezel wire to the size of my ruby cab.  I sanded the bottom to make sure it would sit flat on a piece of sterling silver and soldered those together.
After cutting off the extra silver and filing the edges flush, I made a simple band of sterling wire.  Then I soldered the bezel cup onto the band.

Finally, I popped the ruby in and burnished the bezel walls to hold it in place.
I'm pretty happy with how it turned out!
For in depth tutorials on the technique of bezel setting, check out these links:

http://www.instructables.com/id/Bezel-Setting-Tutorial/ 

http://www.professionaljeweler.com/archives/articles/2000/may00/0500fys1.html